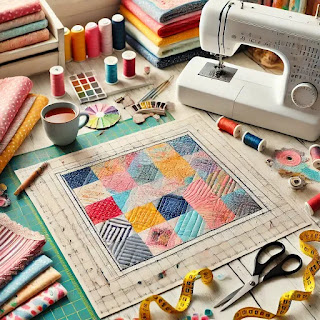
Designing Your Own Quilting Patterns Made Easy
Hey there! So, you’ve been bitten by the quilting bug, huh? Welcome to the club! Today, let’s chat about something super fun: designing your own quilting patterns. Don’t worry; it’s not as intimidating as it sounds. In fact, it’s kind of like doodling on paper, but with fabric. Trust me, by the end of this, you’ll feel ready to unleash your inner artist on your next quilt project.
Why Design Your Own Pattern?
Let me tell you about the first time I decided to design my own quilt pattern. I’d been following tutorials for a while, and while they were great, I started to feel like I wanted something that was more "me." Something unique that I could proudly say, “Hey, I made this from scratch!” Plus, designing your own pattern lets you play with colors, shapes, and textures in ways you’d never get from a pre-made design.
And let’s be honest: isn’t it exciting to think about creating something no one else has? Whether it’s for your home, a gift, or even just for fun, the joy of seeing your vision come to life is unbeatable.
Step 1: Start with Inspiration
Every great quilt starts with an idea. Inspiration is everywhere: a beautiful sunset, a favorite piece of artwork, or even the tiles in your bathroom floor (yes, really!).
When I designed my first quilt, I was inspired by a stained glass window in a tiny café I stumbled into. The colors and patterns were mesmerizing, and I knew I had to turn that into a quilt. Grab a notebook or your phone and start snapping pictures or sketching things that catch your eye. You’ll be amazed at how quickly ideas start flowing.
Step 2: Sketch It Out
Okay, now comes the fun part: sketching! You don’t have to be a Picasso for this. Seriously, my first sketches looked like something a kid might draw, but they worked! Start with basic shapes like squares, triangles, and circles. Mix them up, layer them, and see what feels right.
For instance, try drawing a grid of squares and then adding diagonal lines to create triangles. Play around with the placement until it feels balanced. Don’t forget to think about the size of your quilt and how the pattern will repeat across it.
Pro tip: Use graph paper. It’s a lifesaver for keeping your lines straight and proportions accurate.
Step 3: Choose Your Colors
Ah, colors—the best part! Think about the mood you want your quilt to have. Bright and cheerful? Soft and cozy? Bold and modern? When I’m picking colors, I usually start by laying out a palette of fabrics and seeing how they look together. Trust your gut here. If it makes you smile, it’s the right choice.
One time, I used a mix of teal, coral, and mustard for a quilt, and it turned out so vibrant and lively. Don’t be afraid to experiment with unusual combos; you might just discover your new favorite palette.
Step 4: Test Your Design
Before diving into the full quilt, it’s a good idea to make a small test block. This helps you see if your design works as well in fabric as it does on paper. Plus, it’s a chance to tweak things if needed.
I remember testing out a starburst design once. On paper, it looked amazing, but when I sewed it, the angles didn’t quite line up. A quick adjustment to the template fixed it, and the final quilt was a showstopper.
Step 5: Assemble and Sew
Once your test block is good to go, it’s time to scale up and start sewing. Break the pattern into manageable sections and tackle them one at a time. It’s like putting together a giant puzzle—super satisfying!
Oh, and don’t stress about perfection. Quilting is as much about the process as it is about the final product. Embrace those tiny imperfections; they add character.
Step 6: Share Your Masterpiece
You did it! Your very own quilt design, brought to life. Now, don’t just tuck it away in a closet. Show it off! Take photos, share them online, or gift your creation to someone special. There’s nothing quite like seeing others admire something you’ve made with your own two hands.
A Little Encouragement
If you’re feeling a bit nervous about designing your first pattern, that’s totally normal. Just remember, every quilter starts somewhere. Even if your first design isn’t perfect, it’s a step toward building your skills and confidence. And who knows? You might just discover a hidden talent for design along the way.
So, what are you waiting for? Grab some paper, start sketching, and let your imagination run wild. I can’t wait to see what you come up with. Happy quilting, my friend!


Post a Comment for "Designing Your Own Quilting Patterns Made Easy"